Content Menu
● Introduction: Dive Into Swimsuit Customization
>> Why Customize Your Swimsuit?
>> What Are Swimsuit Cups?
>> Understanding the Importance of Swimsuit Cups
>> Types of Swimsuit Cups
● How to Add Cups to Your Swimsuit Easily
>> Getting Started: Tools and Materials
>>> Essential Tools
>>> Choosing the Right Cups
>>> Other Materials
>> Preparing Your Swimsuit
>> Adding Permanent Cups to Your Swimsuit
>> Creating a Pocket for Removable Cups
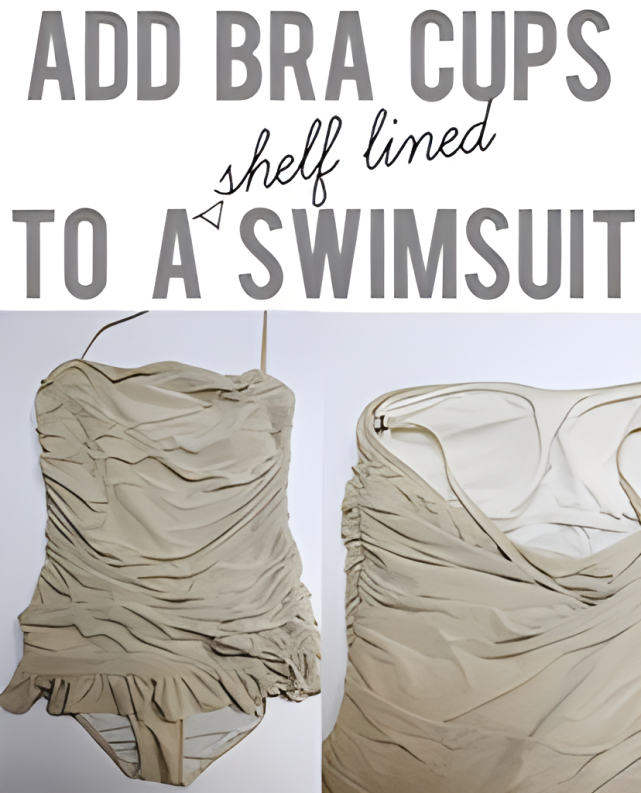
>> Adding Cups to a Shelf Bra
>> DIY Foam Cups
>> Tips for Success
>> Troubleshooting Common Issues
● Enhancing Your Swimwear Wardrobe
>> Maintaining Your Enhanced Swimsuit
● Tips and Tricks for Perfect Customization
>> Ensuring Comfort
>> Aesthetic Considerations
● Conclusion
● FAQs
>> Can I add cups to any type of swimsuit?
>> What if I don't have a sewing machine?
>> Will adding cups ruin my swimsuit?
Swimming is a beloved activity for many, offering a refreshing escape from the heat and a great form of exercise. However, for many women, finding the perfect swimsuit that provides both comfort and support can be a challenge. One solution to this common problem is adding cups to your swimsuit. This process not only enhances support but also allows for customization of fit and style. In this comprehensive guide, we'll explore various methods to add cups to your swimsuit, whether you're working with a new suit or revamping an old favorite.

Introduction: Dive Into Swimsuit Customization
Swim season can be a lot of fun, but finding the perfect swimsuit can sometimes be tricky. This is where swimwear customization comes in! Customizing your swimsuit means you can make it fit your style and comfort better. One popular way to do this is by learning how to add cups to a swimsuit. Adding cups can provide extra support, which makes swimming and playing in the water much more enjoyable.
You might wonder why people choose swimsuit alteration. The reasons can vary! Some might want a better fit, while others might want to feel more confident in their swimwear. With a little creativity and some guidance, customizing your swimsuit can be super simple and fun!
Why Customize Your Swimsuit?
There are many reasons to customize your swimsuit. First, it can help you get a better fit. Sometimes, swimsuits don't fit just right, and adding cups can change that. Second, cups can offer more support. If you play sports or swim a lot, having proper support is really important. Lastly, customizing your swimsuit allows you to express your personal style! You can choose cups that make you feel great and match your favorite colors.
What Are Swimsuit Cups?
So, what exactly are swimsuit cups? Swimsuit cups are little pieces of padding that go inside the swimsuit. They can be soft and flexible, helping the swimsuit fit better and feel more comfortable. Cups can also help shape the swimsuit and give it a nice look. When you add cups, it can feel like you're wearing a better-fitting suit, and that makes swimming even more fun!
Understanding the Importance of Swimsuit Cups
Before diving into the how-to, it's essential to understand why adding cups to your swimsuit can be beneficial. Swimsuit cups serve multiple purposes:
1. Enhanced Support: Cups provide additional support, especially for those with larger busts, making swimming and water activities more comfortable.
2. Improved Shape: They help maintain the shape of the swimsuit, preventing unflattering sagging or flattening.
3. Modesty: Cups can offer an extra layer of coverage, preventing show-through when the suit is wet.
4. Customization: Adding cups allows you to tailor the fit of your swimsuit to your specific body shape and preferences.
5. Versatility: With removable cups, you can adjust your swimsuit for different activities or personal comfort levels.
Types of Swimsuit Cups
There are several types of cups you can add to your swimsuit, each with its own advantages:
1. Foam Cups: These are lightweight, provide shape, and offer moderate support. They're ideal for those who want a natural look with some enhancement.
2. Molded Cups: Pre-shaped cups that provide more structure and support. They're great for creating a defined silhouette.
3. Push-Up Cups: These have additional padding at the bottom to create lift and cleavage.
4. Removable Pads: These inserts can be taken out for washing or adjusting the level of padding.
5. Underwire Cups: While less common in swimwear, these provide maximum support and are ideal for larger busts.

How to Add Cups to Your Swimsuit Easily
Discover the secret to effortlessly enhancing your swimsuit with these cup-adding tricks you never knew existed!
Getting Started: Tools and Materials
Before you dive into customizing your swimsuit, it's important to gather the right tools and materials. Having everything ready will make the process easier and more fun. Let's explore what you need for sewing swimsuit cups into your DIY swimsuit and ensuring proper swimsuit support.
Essential Tools
First, you will need some essential tools for your project. Here's a quick list:
◆ Needles: Use sewing needles that are designed for stretchy fabric. They will help you sew smoothly without damaging your swimsuit material.
◆ Scissors: A good pair of fabric scissors is important. They should be sharp enough to cut through your swimsuit fabric easily.
◆ Thread: Choose thread that matches the color of your swimsuit. Make sure it's strong enough to hold the cups securely in place.
◆ Measuring tape: You'll need this to measure where you want to place the cups accurately.
◆ Pins: These will help keep everything in place while you sew. You can pin the cups to your swimsuit before sewing to ensure they don't move around.

Choosing the Right Cups
Next, let's talk about choosing the right cups. Swimsuit cups come in different shapes and sizes. Some are soft and flexible, while others are more firm. Think about what feels best for you. You want cups that fit well and provide the right amount of support. Check local stores or online shops to find options that match your style and comfort needs.
Other Materials
Besides the tools, there are some other materials you might want to have on hand:
◆ Fabric glue: If you prefer not to sew, fabric glue can help attach the cups to your swimsuit. Just make sure it's strong and made for stretchy fabrics.
◆ Iron: An iron can help smooth out the fabric before you start sewing. This will help you see where to place the cups better.
◆ Backup materials: It's always a good idea to have extra fabric or cups in case something doesn't go as planned.
With the right tools and materials in hand, you are all set to start your swimsuit alteration project. Remember, customizing your swimwear is a fun way to express your style and ensure you get the best swimsuit support!
Preparing Your Swimsuit
Before adding cups to your swimsuit, you'll need to prepare both the suit and your workspace:
1. Clean the Swimsuit: If you're working with an existing suit, ensure it's clean and dry.
2. Gather Materials: You'll need the following:
◆ Swimsuit cups (choose the type that best suits your needs)
◆ Scissors
◆ Pins
◆ Needle and thread (or a sewing machine)
◆ Fabric marker or chalk
◆ Measuring tape
3. Choose Your Method: Decide whether you want to add permanent or removable cups. This will determine your approach.
4. Measure Carefully: Put on the swimsuit and mark where your bust sits naturally. This will help you position the cups correctly.
Adding Permanent Cups to Your Swimsuit
For a more integrated look, you might prefer to sew cups permanently into your swimsuit. Here's how:
Step 1: Position the Cups Put on your swimsuit inside out. Place the cups where they naturally sit on your bust. Use pins to hold them in place temporarily.
Step 2: Mark the Placement Take off the swimsuit carefully, keeping the pins in place. Use a fabric marker to trace around the cups lightly.
Step 3: Prepare for Sewing Remove the pins and cups. Turn the swimsuit right side out.
Step 4: Sew the Cups Place the cups back into position on the inside of the suit. Using a needle and thread or a sewing machine with a zigzag stitch, sew around the edges of the cups. Be careful not to stretch the fabric as you sew.
Step 5: Finish and Test Trim any excess thread and try on the swimsuit to ensure the cups are secure and comfortable.
Creating a Pocket for Removable Cups
If you prefer the flexibility of removable cups, creating a pocket is an excellent option:
Step 1: Cut the Lining If your swimsuit doesn't already have a lining, cut a piece of swimsuit lining fabric to fit the bust area.
Step 2: Create an Opening On the top edge of the lining, leave a 3-4 inch opening in the center. This will be where you insert the cups.
Step 3: Attach the Lining Pin the lining to the inside of the swimsuit, aligning the edges. Sew around the perimeter, leaving the top opening free.
Step 4: Finish the Opening Fold the edges of the opening inward and sew to create a clean finish.
Step 5: Insert the Cups Slide the removable cups into the pocket through the opening.
Adding Cups to a Shelf Bra
Many swimsuits come with a built-in shelf bra. Here's how to add cups to this type of suit:
Step 1: Locate the Shelf Bra Identify the shelf bra layer inside your swimsuit.
Step 2: Create Openings Cut small slits in the shelf bra layer where the cups will sit.
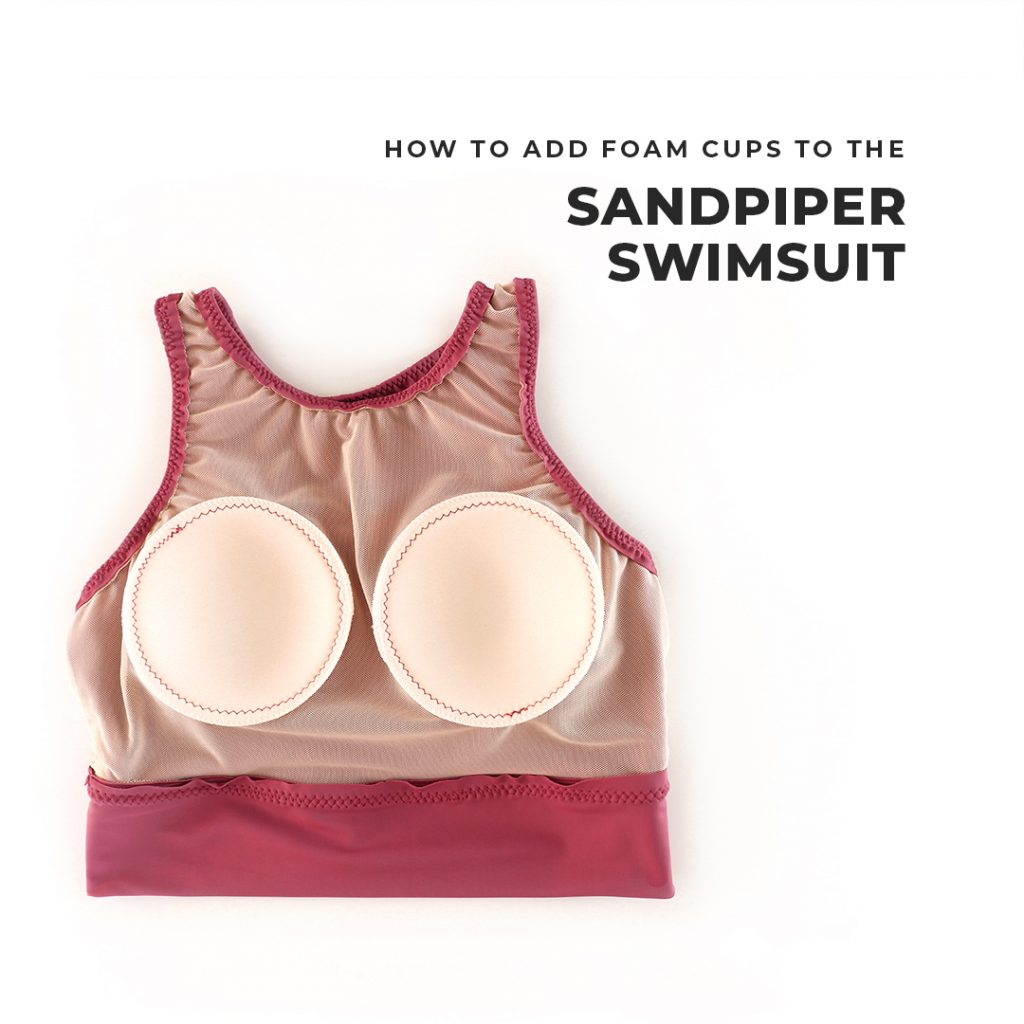
Step 3: Insert the Cups Slide the cups through these openings, positioning them correctly.
Step 4: Secure the Cups Use a few small stitches to keep the cups in place if desired, or leave them free-floating for easy removal and washing.
DIY Foam Cups
For a truly custom fit, you can create your own foam cups:
Step 1: Create a Template Use an existing bra cup or draw a cup shape on paper that fits your measurements.
Step 2: Cut the Foam Trace the template onto swimwear foam and cut out two identical pieces.
Step 3: Shape the Cups Gently curve the foam pieces to create a natural bust shape.
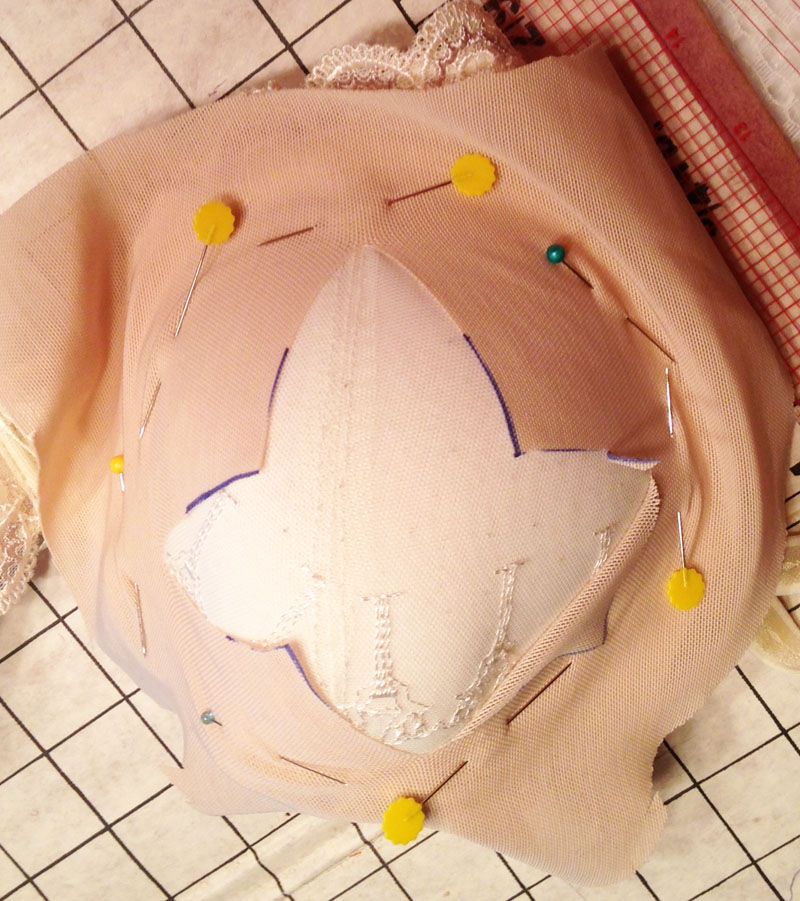
Step 4: Cover the Foam Cut fabric slightly larger than the foam pieces. Wrap the fabric around the foam and sew the edges to secure.
Step 5: Attach to the Swimsuit Sew these custom cups into your swimsuit using the permanent method described earlier.
Tips for Success
1. Choose the Right Size: Ensure the cups you select are proportionate to your bust size and the cut of your swimsuit.
2. Consider the Swimsuit Style: Different styles (e.g., triangle top, bandeau, one-piece) may require different cup shapes or placement.
3. Use Swimwear-Specific Materials: Opt for cups and threads designed to withstand chlorine and saltwater.
4. Take Your Time: Careful placement and sewing will result in a more comfortable and natural-looking fit.
5. Hand Wash: After adding cups, it's best to hand wash your swimsuit to maintain its shape and extend its life.
Troubleshooting Common Issues
1. Cups Shifting: If removable cups tend to move, try adding a few small, discreet stitches to hold them in place.
2. Visible Cup Edges: Choose thinner cups or adjust the placement to sit further from the swimsuit edges.
3. Uncomfortable Fit: Experiment with different cup types or sizes until you find the most comfortable option.
4. Puckering Fabric: Ensure you're not stretching the fabric while sewing, and consider using a walking foot on your sewing machine.

Enhancing Your Swimwear Wardrobe
Adding cups to your swimsuit is just the beginning. Once you've mastered this skill, you can apply it to various swimwear pieces:
1. Bikini Tops: Add cups to triangle tops for extra shape and support.
2. Tankinis: Create a more structured look by adding cups to the bust area.
3. One-Piece Suits: Enhance the silhouette of your favorite one-piece with well-placed cups.
4. Cover-Ups: Even beach dresses or tunics can benefit from subtle cup inserts for a smoother line.
Maintaining Your Enhanced Swimsuit
After adding cups to your swimsuit, proper care is essential to maintain its shape and extend its lifespan:
1. Rinse After Use: Always rinse your swimsuit in fresh water after swimming, especially if you've been in chlorinated or salt water.
2. Gentle Washing: Hand wash your swimsuit using a mild detergent designed for delicates.
3. Avoid Wringing: Gently squeeze out excess water rather than twisting or wringing the fabric.
4. Air Dry: Lay your swimsuit flat to dry, away from direct sunlight which can fade and damage the fabric.
5. Rotate Suits: If possible, alternate between different swimsuits to allow each one time to regain its shape between wears.
Tips and Tricks for Perfect Customization
When it comes to swimwear customization, there are a few tips and tricks that can help make the process smoother and more fun. Whether you're making a DIY swimsuit or just want to ensure a great fit and look after adding cups, these helpful hints will guide you along the way.
Ensuring Comfort
Comfort is super important when customizing your swimsuit. After you add cups, wear the swimsuit for a little bit to see how it feels. Move around, stretch, and check if the cups stay in place. If they feel odd or uncomfortable, you may need to adjust their position or even try a different style of cup. Remember, your swimsuit should feel good, so don't rush the process!
Aesthetic Considerations
Now, let's talk about how to keep your swimsuit looking fabulous! When placing the cups, make sure they blend well with the swimsuit's design. Choose cups that match your swimsuit color or style for a smooth look. You can also use fabric glue for those extra secure spots. This way, your customization will not only support you but also look amazing!
Conclusion
Adding cups to your swimsuit is a valuable skill that can significantly enhance your swimming experience. Whether you opt for permanent cups, create pockets for removable inserts, or craft your own custom foam cups, the result is a swimsuit that offers improved support, shape, and confidence. Remember, the key to success lies in careful measurement, precise placement, and patient sewing. With practice, you'll be able to customize any swimsuit to perfectly fit your body and style preferences.
By mastering this technique, you're not just improving a single swimsuit – you're opening up a world of possibilities for your entire swimwear wardrobe. From revamping old favorites to customizing new purchases, the ability to add cups to your swimsuits ensures that you'll always have comfortable, flattering, and supportive options for your water adventures.
So, grab your swimsuit, choose your preferred cup type, and get ready to transform your beach and pool experiences. With your newly enhanced swimwear, you'll be ready to dive into summer with confidence and style!
FAQs
Can I add cups to any type of swimsuit?
Yes, you can add cups to many types of swimsuits! However, the best swimsuits to customize are those that have enough fabric to support the cups. Swimsuits with a bit more structure, like bikinis or tankinis, usually work well. One-piece swimsuits can also be altered, but it may be a little trickier. Just make sure the swimsuit is not too stretchy, as that can make it harder for the cups to stay in place.
What if I don't have a sewing machine?
No worries if you don't have a sewing machine! You can still add cups to your swimsuit by using hand-sewing techniques. All you need is a needle, some thread, and a little patience. Start by making small stitches to secure the cups. It might take longer, but it can be just as effective! Plus, hand-sewing can give you more control over how the cups are placed.
Will adding cups ruin my swimsuit?
Adding cups to your swimsuit doesn't have to ruin it! To avoid mistakes, make sure to take your time and follow each step carefully. Use the right type of thread and needle for stretchy fabric. If you're worried, practice on an old swimsuit first. This way, you can get the hang of it without risking your favorite suit. And remember, if you do it right, your swimsuit can be more comfortable and stylish!


